
Make gift bags out of newspaper
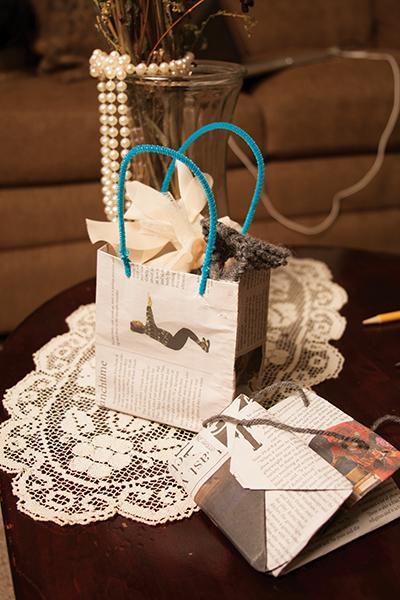
Use this current issue of the State Hornet to save money on gift wrapping this season. Use colorful pipe cleaner, as shown above, to give it a bolder look.
December 5, 2012
It’s that time of year again – full of trees, shopping, gift-giving and, of course, the dreaded gift-wrapping. But we’ve been thinking of you starving Sacramento State students, and have come up with an idea to save some money that you can spend on those you love instead.
Gift bags made from newspaper – heck, you can even use this issue you hold in your hands right now; just follow these easy steps.
For a bag 5 inches tall, 4 1/2 inches wide and 3 inches deep, start with two sheets of paper stacked on top of each other.
Cut out a 151⁄2-inch-by-81⁄4- inch rectangle. Fold a flap 11⁄4 inches down from the top, and 2 inches from the bottom.
This part is a little trickier – vertically fold your paper 41⁄2 inches from the left side, and from there; 3 inches, 41⁄2 inches, 3 inches and finally 1⁄2 inch from the right side so you can have a flap to glue the other side to. You should end up with four folds; these will be the walls of your bag.
If you would like to reinforce the top of your bag, simply grab two pieces of cardstock and cut out a 41⁄4-inch-by-1-inch piece from each. Glue them to the panels measuring 4 1⁄2 inches along the top flap, under the one and a quarter inch fold. After you’ve glued that in, it’s time to glue the top flap down the length of the bag, covering the cardstock. Since the bag is two-ply, you’ll need to glue both flap pieces down, one at a time.
Put glue on the 1⁄2 -inch tab and bring the left-most panel over from the body of the bag, attaching the left side over the right. Glue the top flap to ensure the second sheet is also attached.
Upend the bag so the two inch flap is now facing up. Fold the short sides inward as if you were wrapping a present.
Put glue on both flaps and fold them inward to form the bottom of the bag.
Cut an index card down to 4 inches by 2 1⁄2 inches and glue it to the bottom of the bag to reinforce it, hiding the flaps if you want a sturdier, neater bag.
Punch holes in the rim of the bag, and string some cord through the holes to form handles – knot each end of the string. After that it’s all finished – now sit back and celebrate your fiscally responsible craftiness with some eggnog and gingerbread.
Kaitlin Bruce can be reached at [email protected]